Train a Classifier
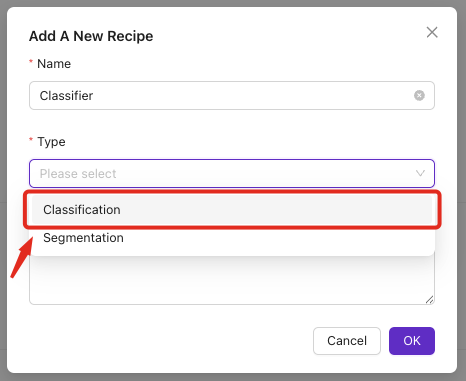
This guide shows you how to configure and train a classification model on the OV80i camera system. Use this procedure when you need to automatically categorize objects into different classes based on visual features.
When to Use Classification: Sorting parts by type, size, color, or condition; identifying different product variants; quality control with multiple acceptable categories.
Prerequisites
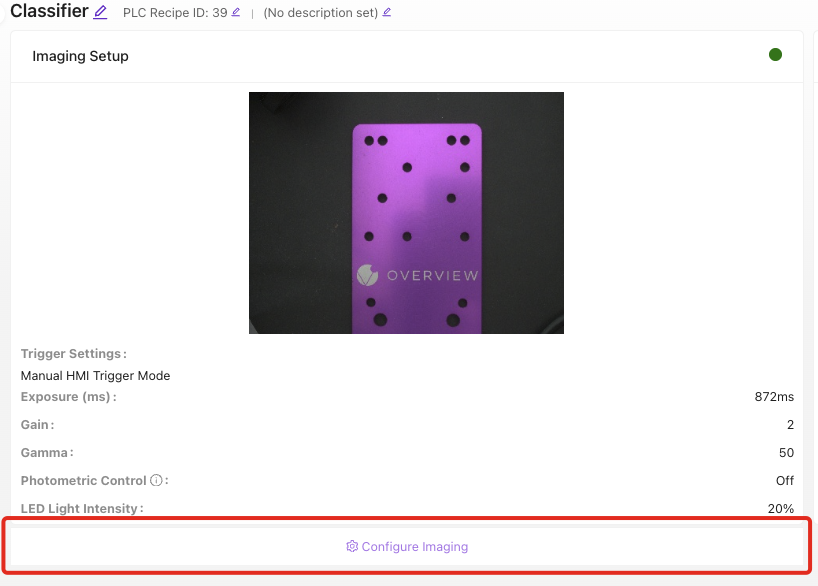
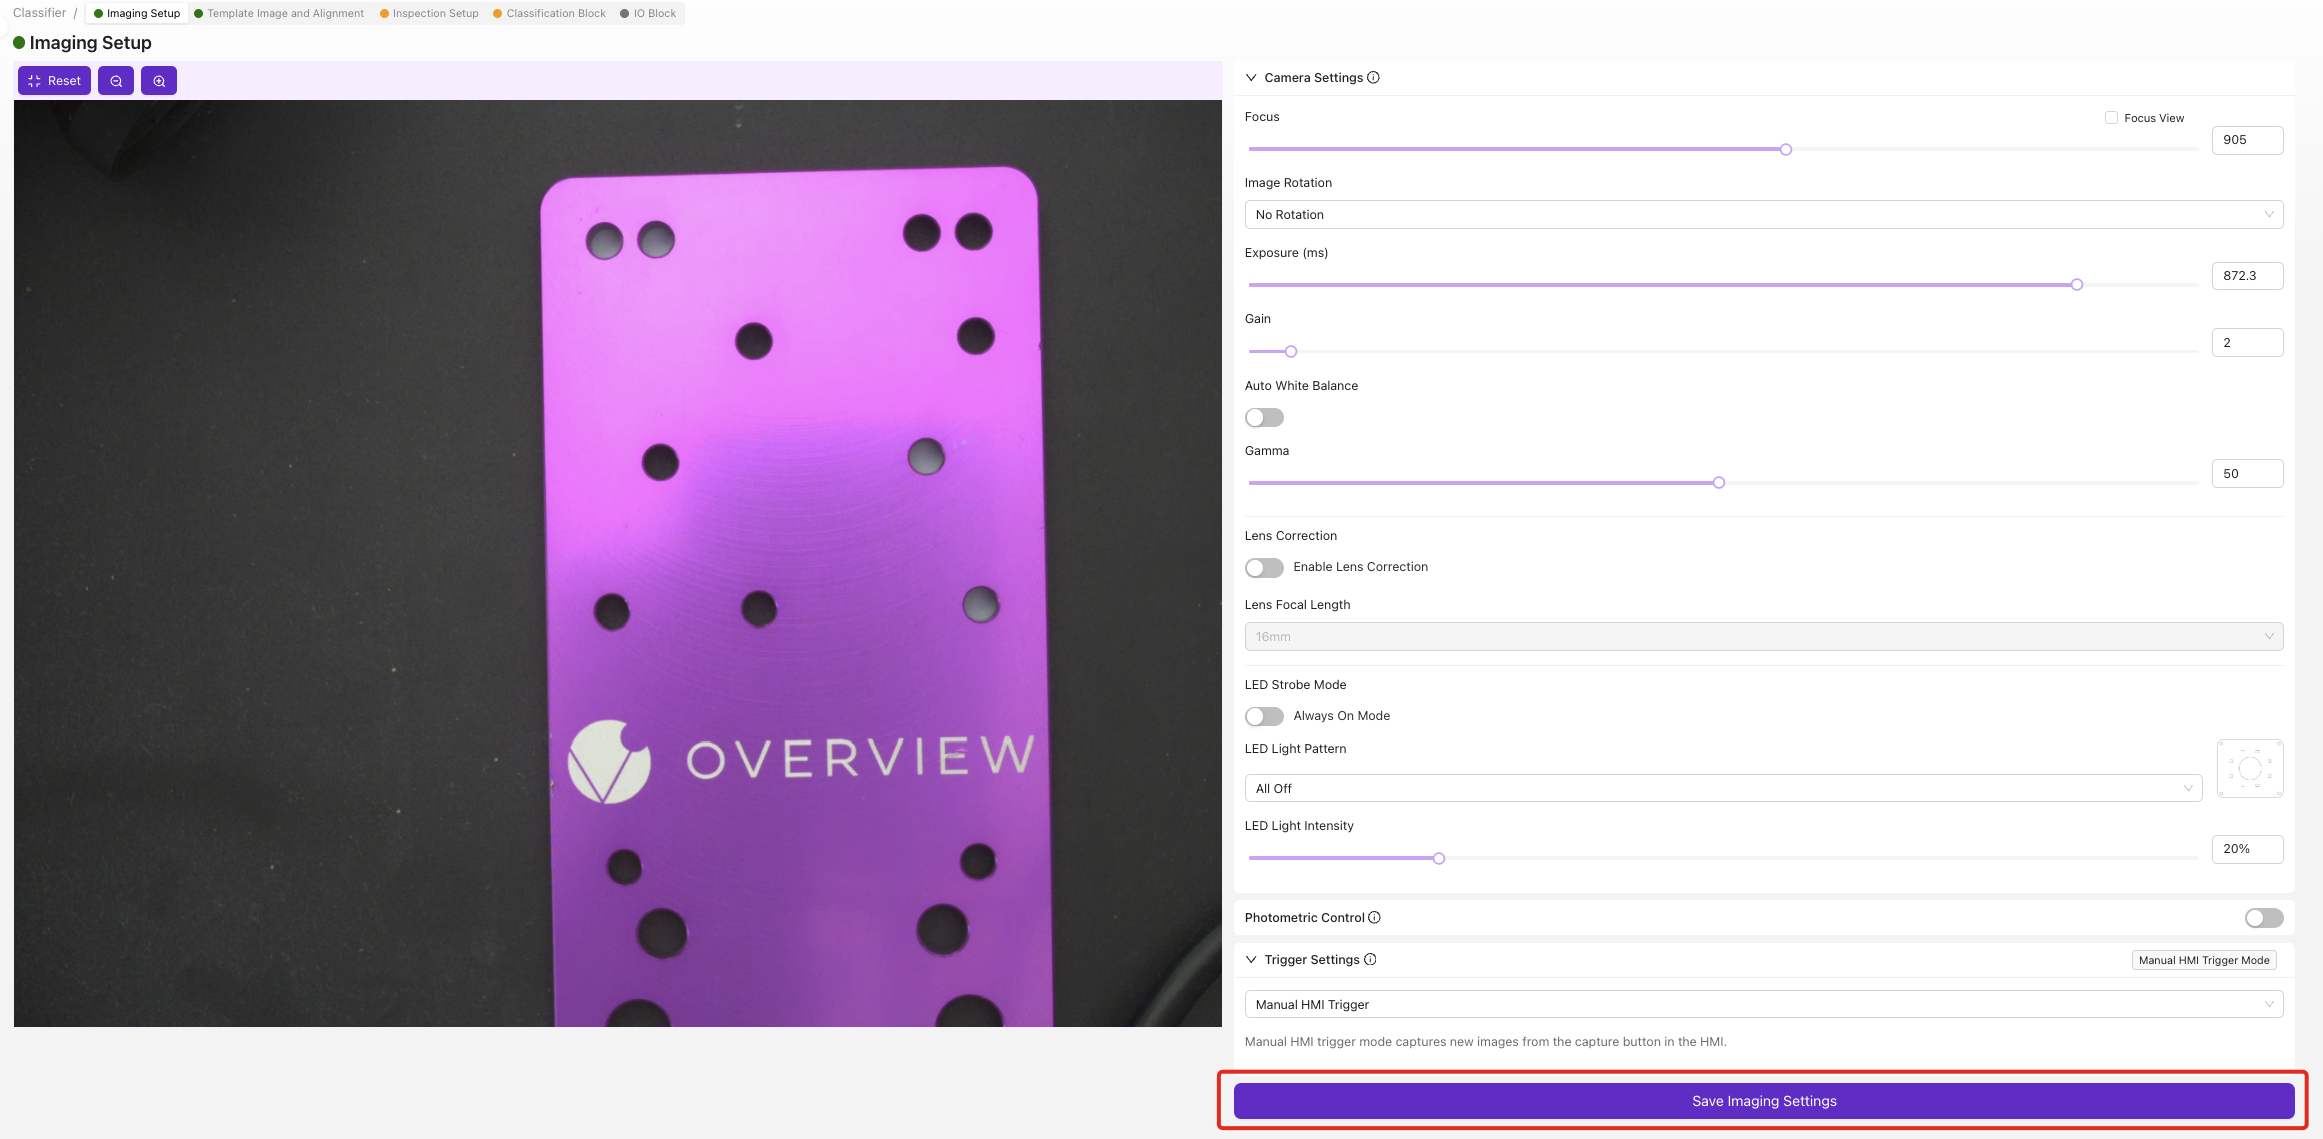
- Active recipe with imaging settings configured
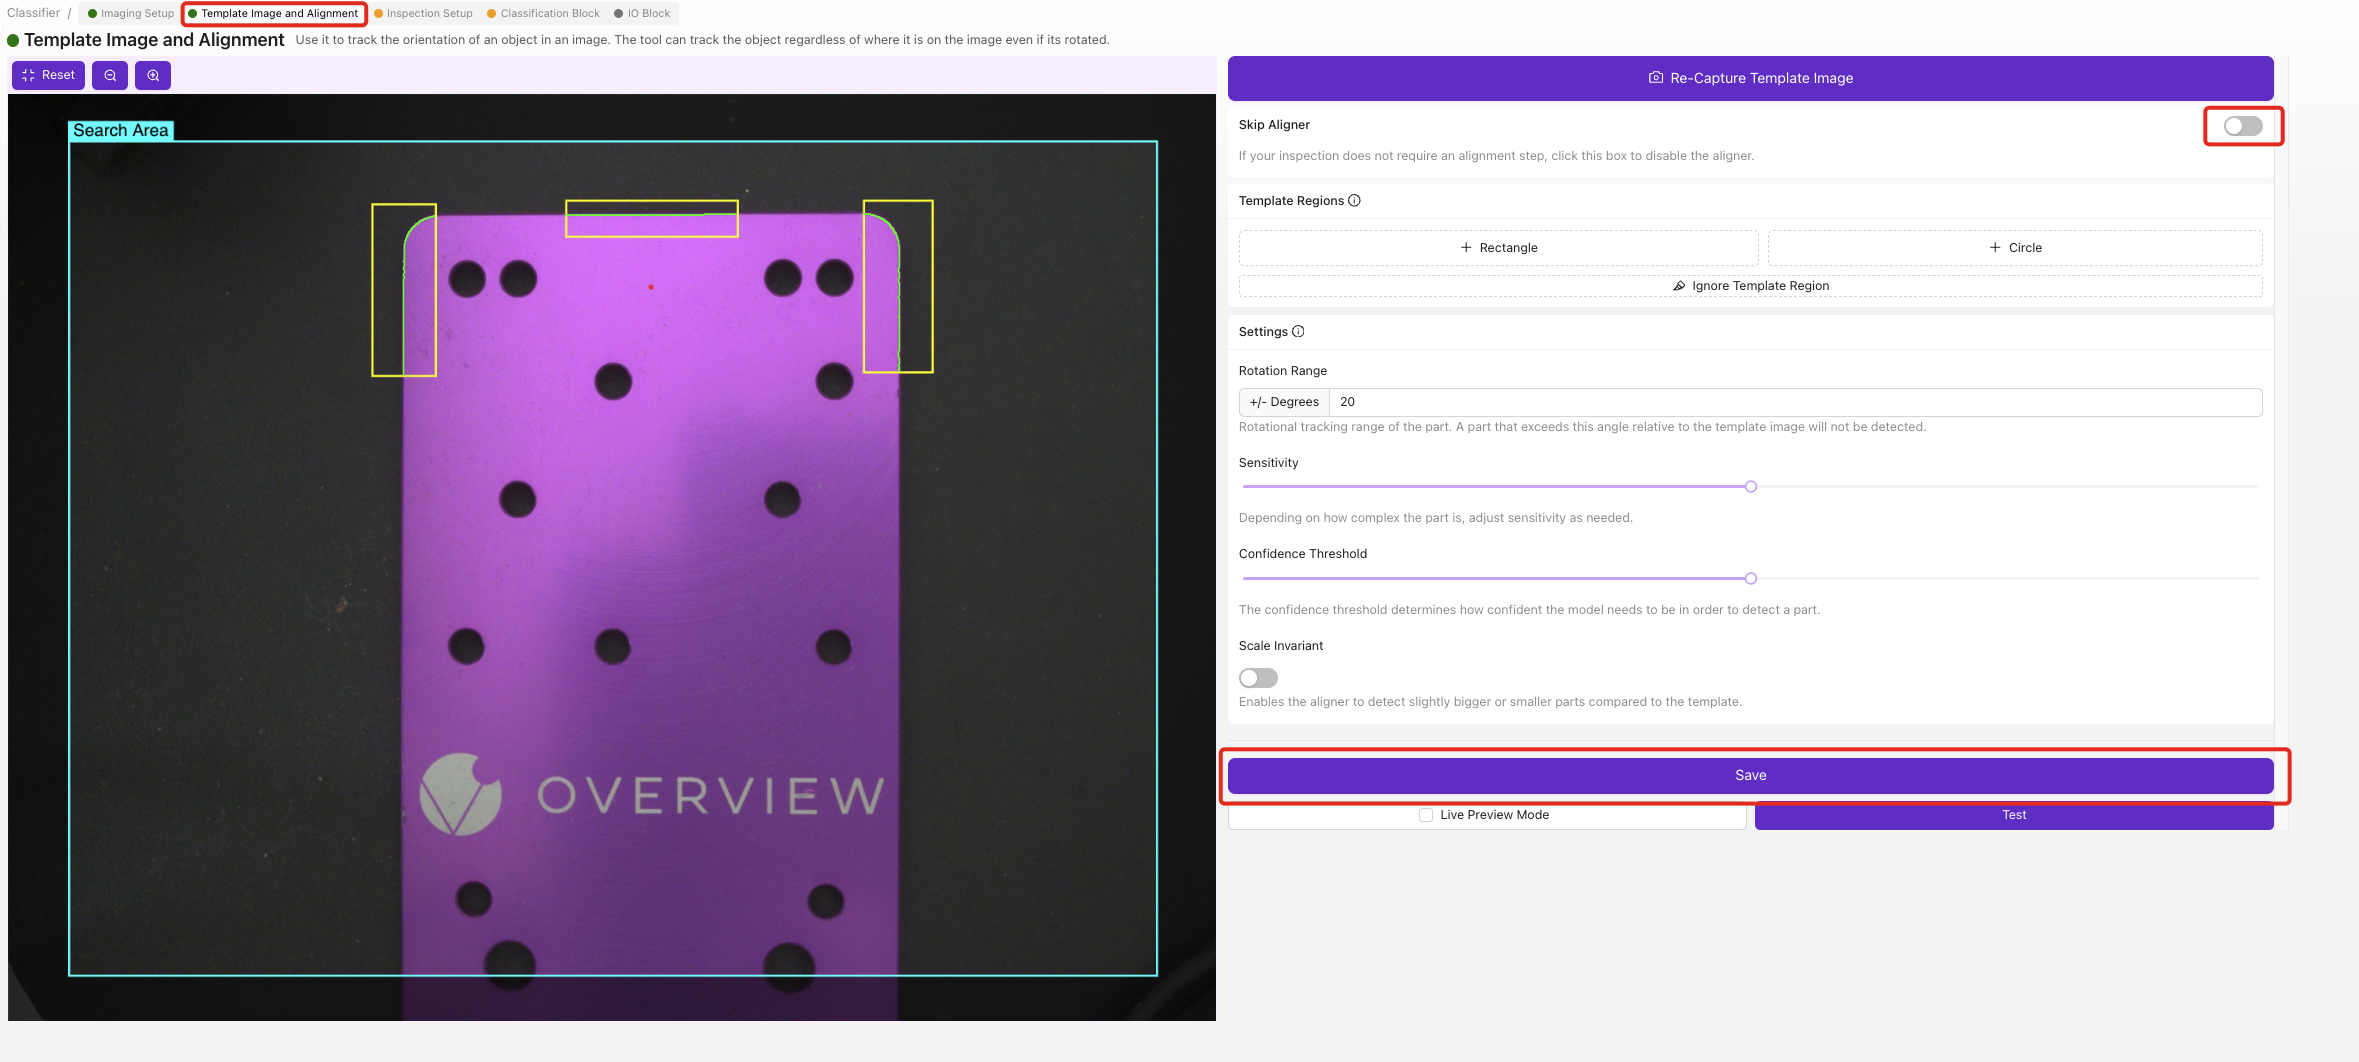
- Template image and alignment completed (or skipped)
- Inspection ROI(s) defined
- Sample objects representing each class you want to detect
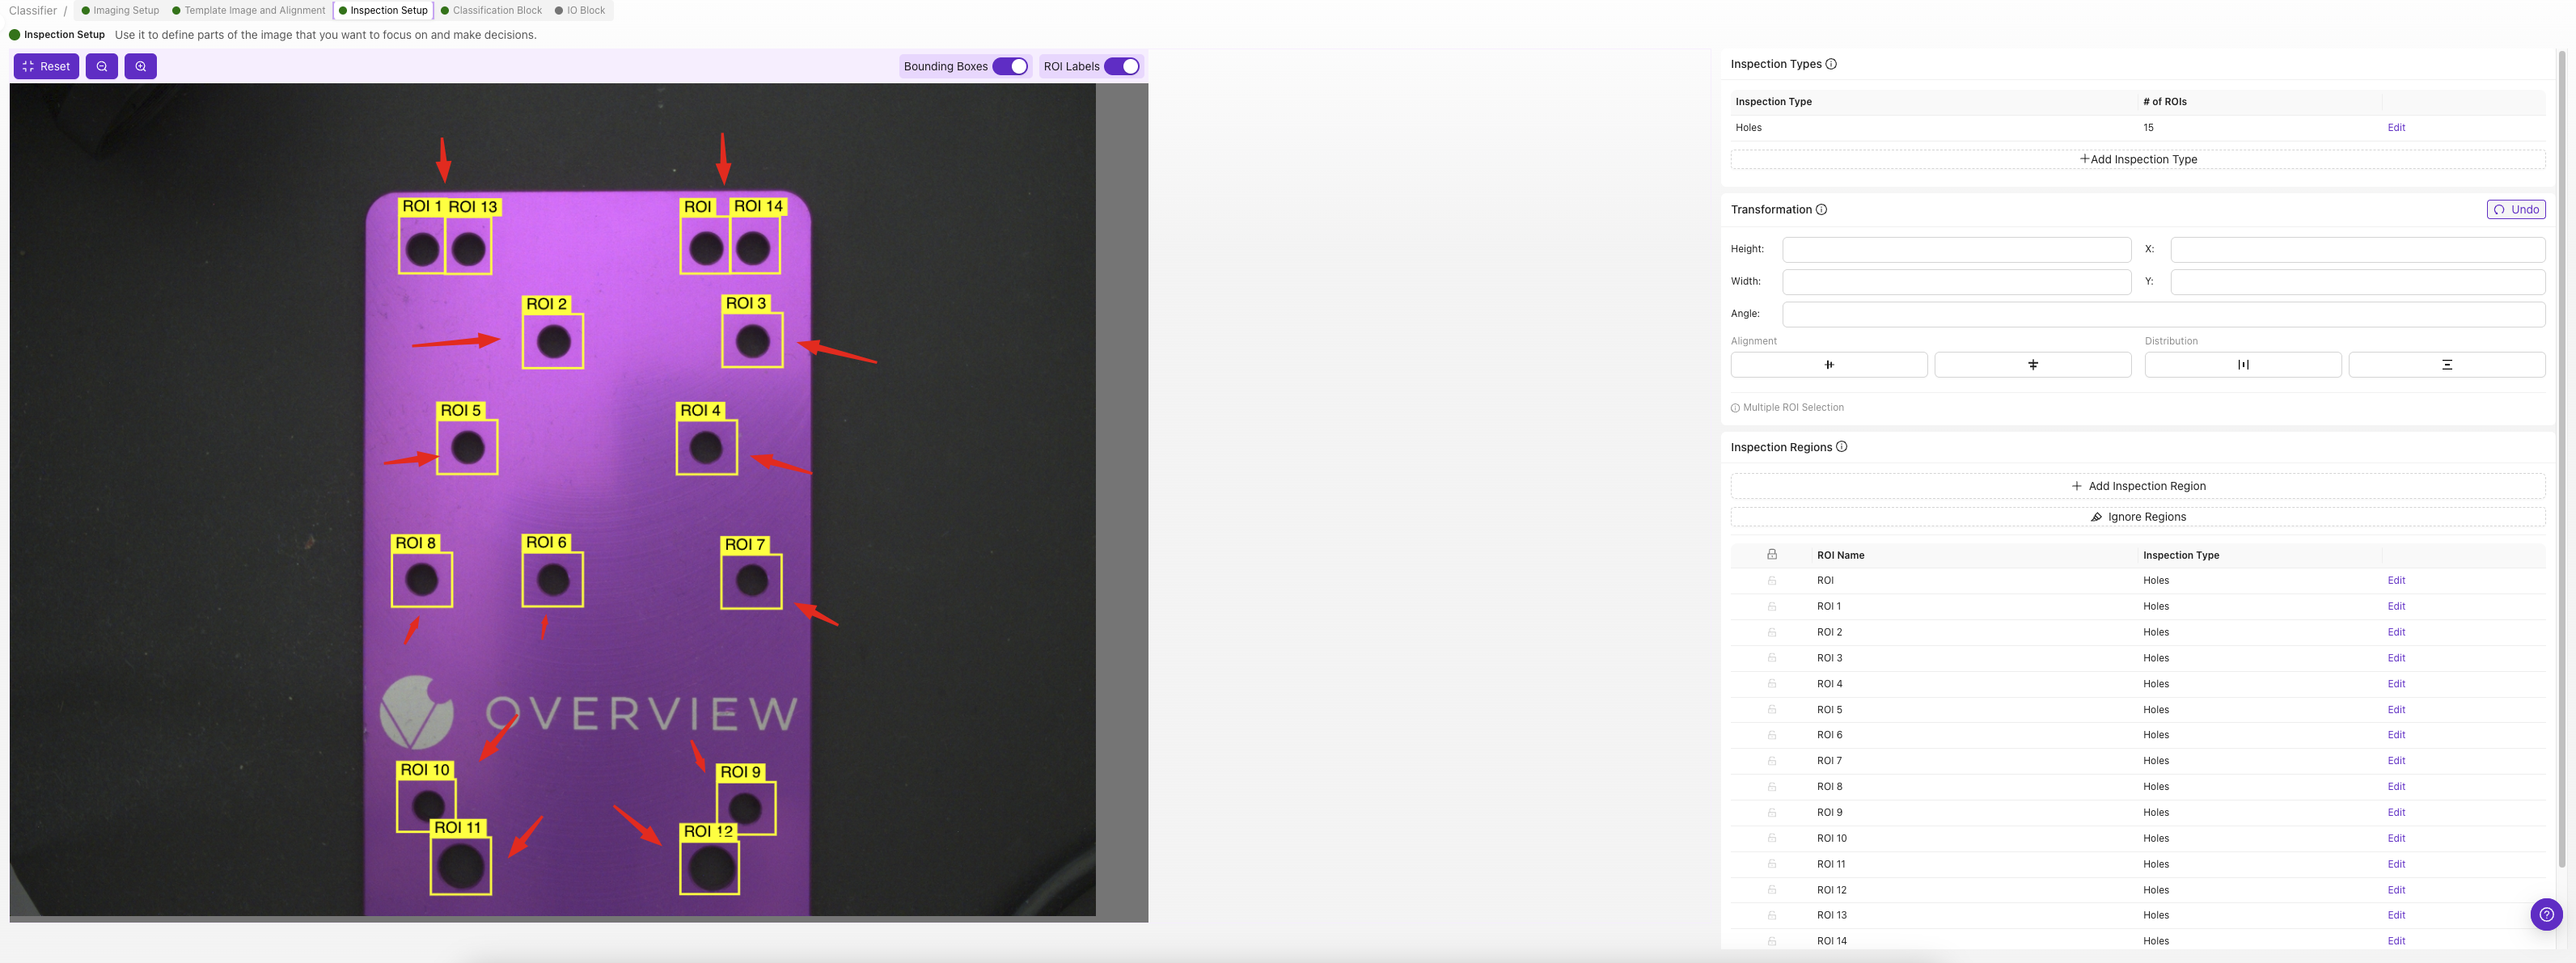
Step 1: Access Classification Block
1.1 Navigate to Classification
- Click "Classification Block" in the breadcrumb menu, OR
- Select from dropdown in navigation bar
![]()
1.2 Verify Prerequisites
Ensure the following blocks show green status:
- ✅ Imaging Setup
- ✅ Template and Alignment (or skipped)
- ✅ Inspection Setup
Step 2: Create Classification Classes
2.1 Define Your Classes
- Click
Editunder "Inspection Types" - Add classes for each category you want to detect
2.2 Configure Each Class
For each class:
- Enter Class Name: Use descriptive names (e.g., "Small", "Medium", "Large")
- Select Class Color: Choose distinct colors for visual identification
- Add Description: Optional details about the class
- Click
Save
2.3 Class Naming Best Practices
| Good Names | Poor Names |
|---|---|
| Small_Bolt, Medium_Bolt, Large_Bolt | Type1, Type2, Type3 |
| Red_Cap, Blue_Cap, Green_Cap | Color1, Color2, Color3 |
| Good_Part, Defective_Part | Pass, Fail |
| Screw_PhillipsHead, Screw_Flathead | A, B |
Step 3: Capture Training Images
3.1 Image Capture Process
For each class, capture minimum 5 images (10+ recommended):
- Place object representing the class in the inspection area
- Verify object is within ROI boundaries
- Click
Captureto take training image - Select appropriate class from dropdown
- Click
Saveto store labeled image - Repeat with different examples of the same class
3.2 Training Data Requirements
| Class | Minimum Images | Recommended Images | Notes |
|---|---|---|---|
| Each class | 5 | 10-15 | More images = better accuracy |
| Total dataset | 15+ | 30-50+ | Balanced across all classes |
| Edge cases | 2-3 per class | 5+ per class | Borderline examples |
3.3 Training Image Best Practices
Do:
- Use different examples within each class
- Vary object orientations and positions
- Include good lighting conditions
- Capture edge cases and borderline examples
- Maintain consistent ROI framing
Don't:
- Use identical objects repeatedly
- Include multiple objects in one ROI
- Mix classes in single images
- Use blurry or poorly lit images
- Change ROI size between captures
3.4 Quality Control
After capturing each image:
- Review image quality in preview
- Verify correct class label assignment
- Delete poor quality images using
Deletebutton - Retake if necessary
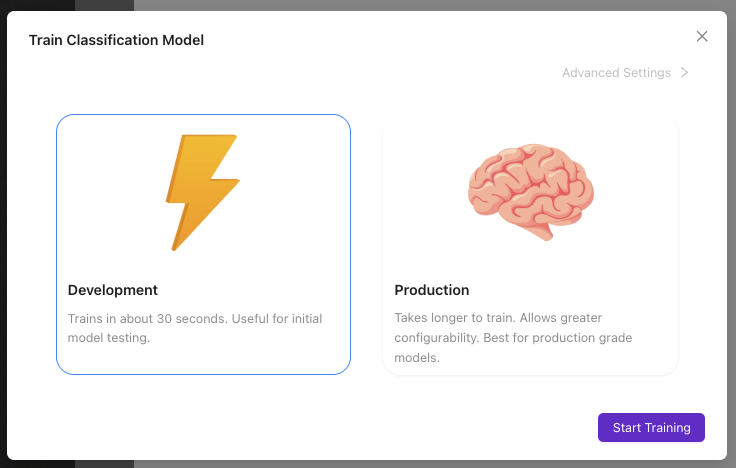
Step 4: Configure Training Parameters
4.1 Access Training Settings
- Click
Train Classification Modelbutton
4.2 Select Training Mode
Choose based on your needs:
| Training Mode | Duration | Accuracy | Use Case |
|---|---|---|---|
| Fast | 2-5 minutes | Good for testing | Initial model validation |
| Balanced | 5-15 minutes | Production ready | Most applications |
| Accurate | 15-30 minutes | Highest precision | Critical applications |
4.3 Set Iteration Count
Manual iteration setting:
- Low (50-100): Quick testing, basic accuracy
- Medium (200-500): Production quality
- High (500+): Maximum accuracy, slower training
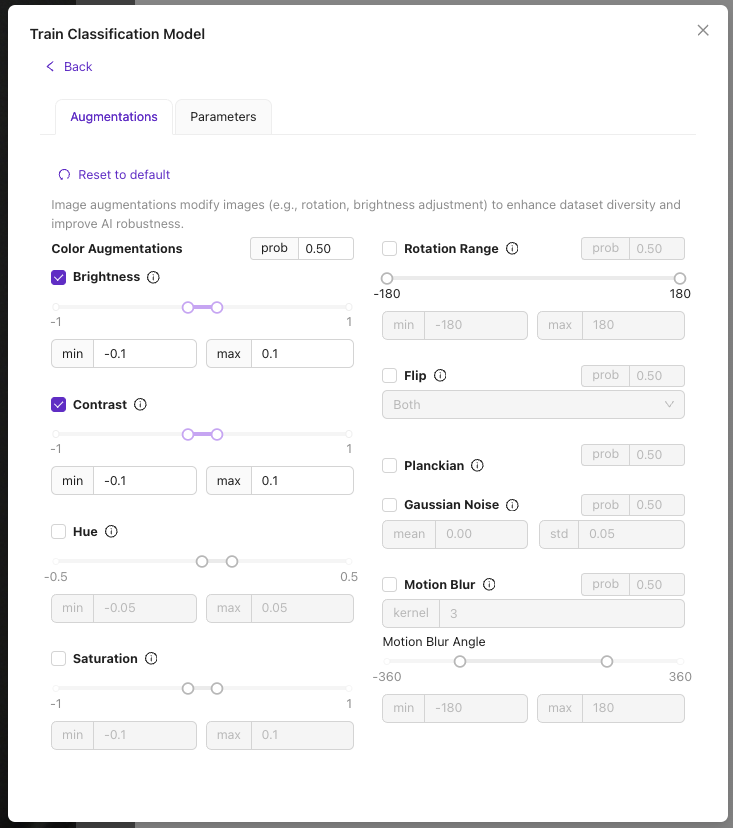
4.4 Advanced Settings (Optional)
Batch Size:
- Smaller batches: More stable training, slower
- Larger batches: Faster training, may be less stable
Learning Rate:
- Lower values: More stable, slower learning
- Higher values: Faster learning, risk of instability
Recommendation: Use default settings unless you have specific performance requirements.
Step 5: Start Training Process
5.1 Initialize Training
- Review training configuration
- Click
Start Training - Monitor progress in training modal
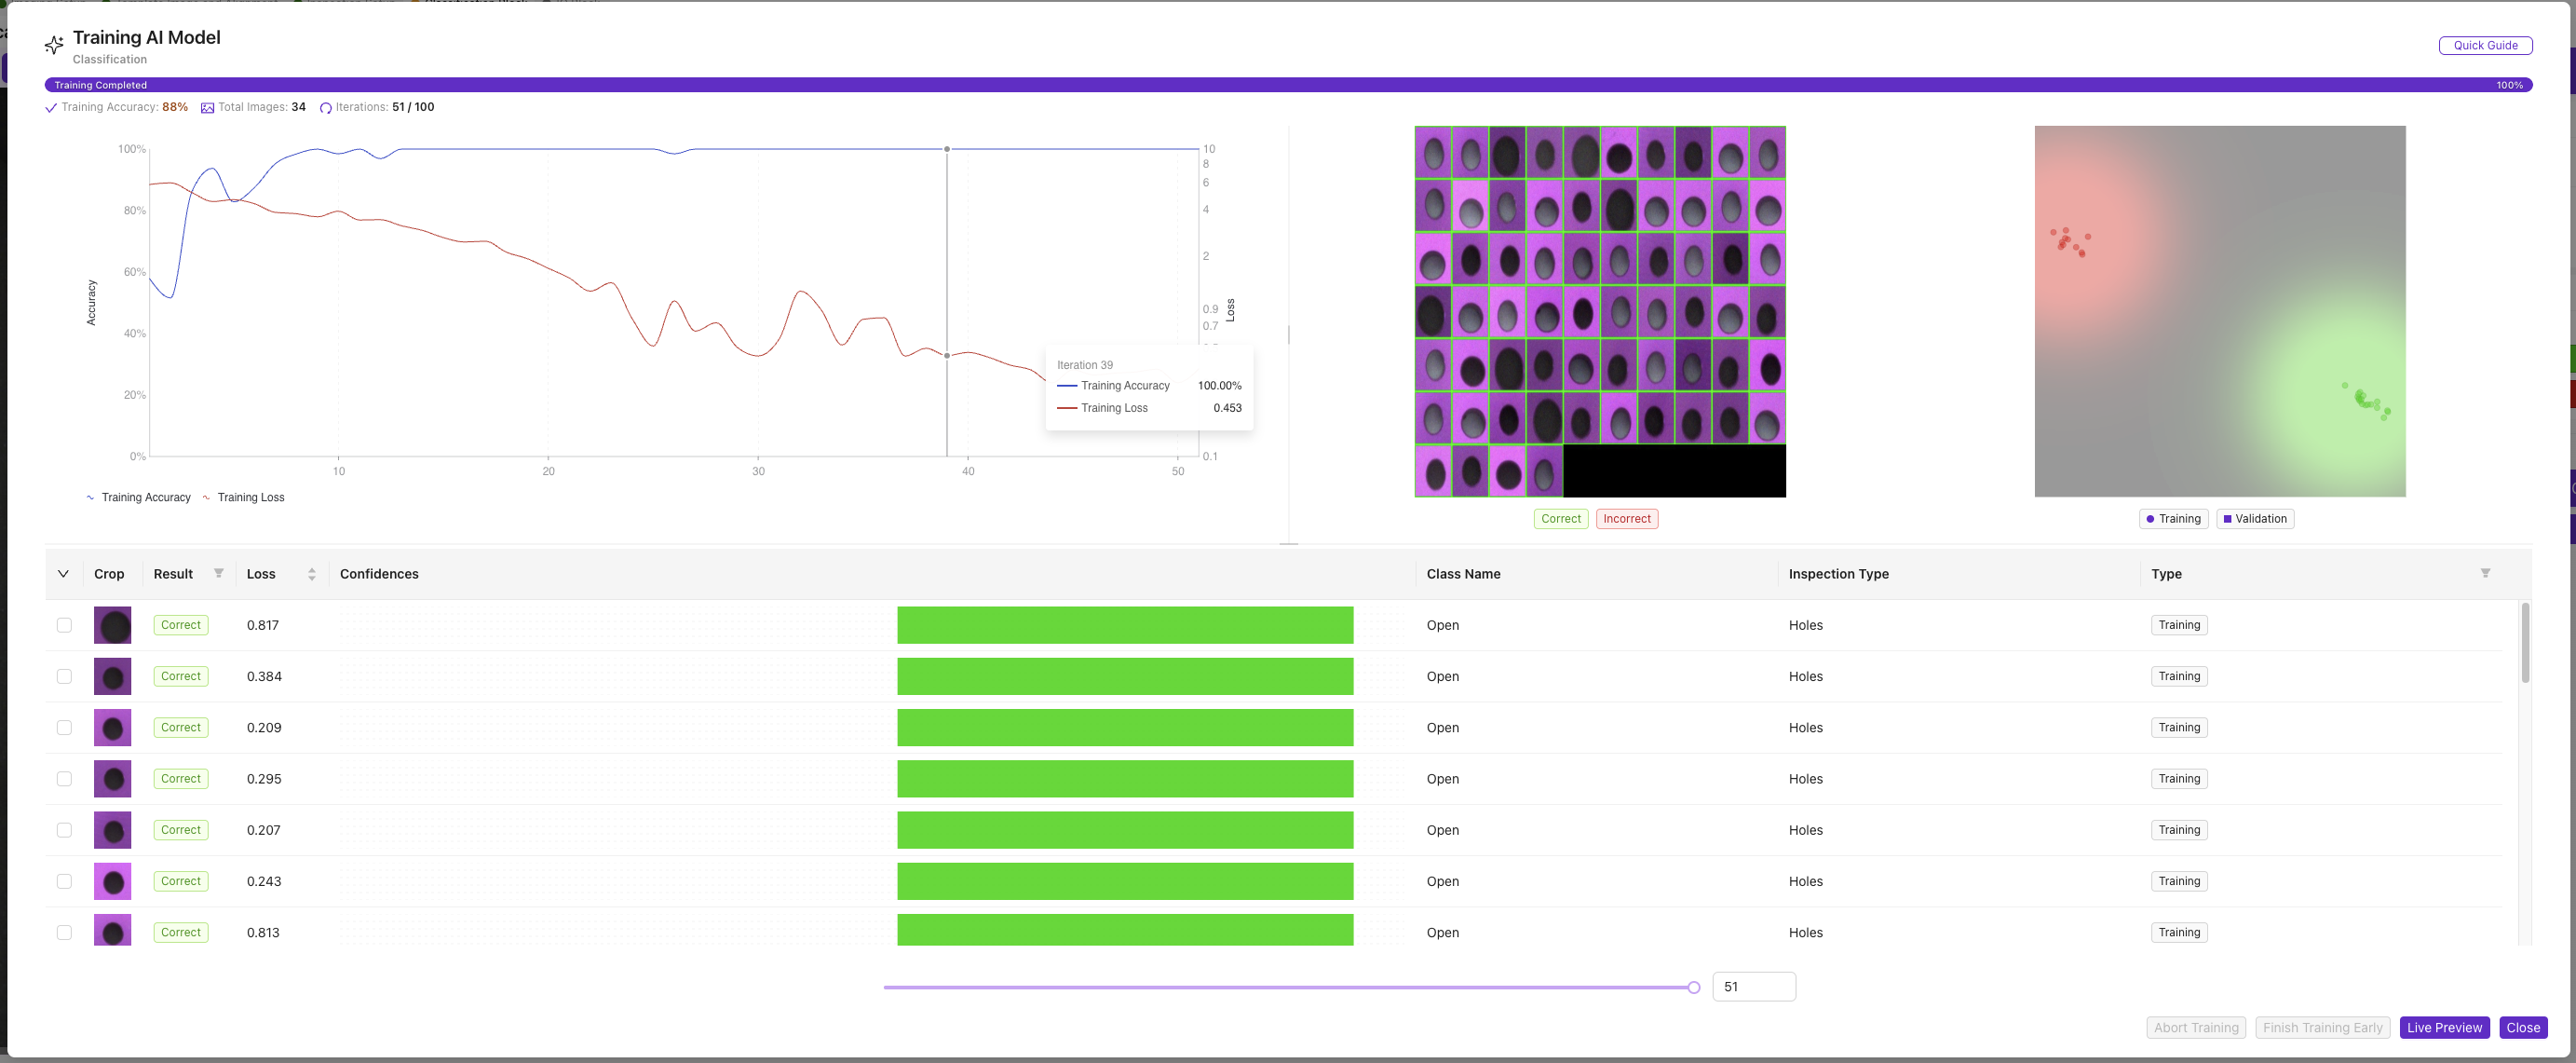
5.2 Training Progress Indicators
Monitor these metrics:
- Current Iteration: Progress through training cycles
- Training Accuracy: Model performance on training data
- Estimated Time: Remaining training duration
- Loss Value: Model error (should decrease over time)
5.3 Training Controls
Available actions during training:
- Abort Training: Stop training immediately
- Finish Early: Stop when current accuracy is sufficient
- Extend Training: Add more iterations if needed
5.4 Training Completion
Training stops automatically when:
- Target accuracy reached (typically 95%+)
- Maximum iterations completed
- User manually stops training
Step 6: Evaluate Model Performance
6.1 Review Training Results
Check final metrics:
- Final Accuracy: Should be >85% for production use
- Training Time: Note duration for future reference
- Convergence: Verify accuracy stabilized
6.2 Model Quality Indicators
| Accuracy Range | Quality Level | Recommendation |
|---|---|---|
| 95%+ | Excellent | Ready for production |
| 85-94% | Good | Suitable for most applications |
| 75-84% | Fair | Consider more training data |
| <75% | Poor | Retrain with more/better images |
6.3 Troubleshooting Poor Performance
| Problem | Likely Cause | Solution |
|---|---|---|
| Low accuracy (<75%) | Insufficient training data | Add more labeled images |
| Training doesn't improve | Poor image quality | Improve lighting/focus |
| Classes confused | Similar-looking objects | Add more distinguishing examples |
| Overfitting | Too few images per class | Balance dataset across classes |
Step 7: Test Classification Performance
7.1 Live Testing
- Click
Live Previewto access real-time testing - Place test objects in inspection area
- Observe classification results:
- Predicted class name
- Confidence percentage
- Processing time
7.2 Validation Testing
Systematic validation process:
| Test Object | Expected Class | Actual Result | Confidence | Pass/Fail |
|---|---|---|---|---|
| Known Class A object | Class A | _____ | ____% | ☐ |
| Known Class B object | Class B | _____ | ____% | ☐ |
| Borderline example | Class A or B | _____ | ____% | ☐ |
| Unknown object | Low confidence | _____ | ____% | ☐ |
7.3 Performance Validation
Verify these aspects:
- Accuracy: Correct classifications for known objects
- Confidence: High confidence (>80%) for clear examples
- Consistency: Repeatable results for same object
- Speed: Acceptable processing time for your application
Step 8: Model Optimization
8.1 If Performance is Unsatisfactory
Iterative improvement process:
- Identify problem areas:
- Which classes are confused?
- What objects are misclassified?
- Are confidence levels appropriate?
- Add targeted training data:
- More examples of confused classes
- Edge cases and borderline examples
- Different lighting/positioning conditions
- Retrain model:
- Use "Accurate" mode for better performance
- Increase iteration count
- Monitor improvement in accuracy
8.2 Advanced Optimization
For critical applications:
- Data augmentation: Use varied lighting and positions
- Transfer learning: Start from similar trained models
- Ensemble methods: Combine multiple models
- Regular retraining: Update with new production data
Step 9: Finalize Configuration
9.1 Save Model
- Verify satisfactory performance
- Model automatically saves when training completes
- Note model version for documentation
9.2 Documentation
Record these details:
- Training date and version
- Number of images per class
- Training mode and iterations used
- Final accuracy achieved
- Any special considerations
9.3 Backup Configuration
- Export recipe for backup
- Save training images separately if needed
- Document model parameters
Success! Your Classifier is Ready
Your trained classification model can now:
- Automatically categorize objects into defined classes
- Provide confidence scores for each prediction
- Process images in real-time for production use
- Integrate with I/O logic for automated decision-making
Ongoing Maintenance
Regular Model Updates
- Monitor performance over time
- Add new training data as needed
- Retrain periodically to maintain accuracy
- Update classes for new product variants
Performance Monitoring
- Track accuracy metrics in production
- Identify drift in model performance
- Schedule retraining based on performance degradation
Next Steps
After training your classifier:
- Configure I/O logic for pass/fail decisions
- Set up production workflows in IO Block
- Test complete inspection system end-to-end
- Deploy to production environment
Common Pitfalls
| Pitfall | Impact | Prevention |
|---|---|---|
| Insufficient training data | Poor accuracy | Use 10+ images per class |
| Imbalanced classes | Biased predictions | Equal images across classes |
| Poor image quality | Inconsistent results | Optimize lighting and focus |
| Overly similar classes | Confused classifications | Choose distinct class definitions |
| No validation testing | Production failures | Always test with unseen objects |